


Hope you had a great weekend. I think my oatmeal cookie bars really paid off, because we worked well, and accomplished enough this weekend. I say “enough” because there’s only so many hours in the day and the way I see it, whatever you accomplish, big or small is enough. So I’ll take a minute and give an update on “just enough” in the master bedroom project. Baby steps seemed appropriate for the title of this post because that’s exactly what it takes around here.
The walls are done, the beams and door frames stained and now we turn to the windows and trim. When I say trim I MEAN LOTS OF TRIM. We ran over 120 feet of trim. It has to go wherever the woodwork and sheetrock meet to provide a nice finished edge. It’s a must with this post and beam construction… otherwise it just looks messy.

In the past we have gone out and bought 8 foot sections of square trim already cut and ready to go just to save time, but it seems like everything else the price of a simple piece of trim has gotten ridiculous. It was going to cost us almost $75 for the stock trim and Richie refused to do it. He came home with 8 foot boards and we decided to just rip our own. It didn’t take that long and it only cost us $28.00. That was worth the 15 extra minutes. FOR SURE!
So each piece was cut and then each piece had to be stained. Some gray, some white and they all needed two coats. I feel sorry for our neighborhood because our front driveway is always a “project zone” where we’re making messes. So we set up two saw horses and I went for it. TEDIOUS, TEDIOUS. I’m using an opaque stain on the house. It’s sort of like a paint but goes on just like a stain without all the mess. The wood just soaks it up and it leaves a beautiful finish. I highly recommend the Cabot line.

You can see what a difference that little piece of trim makes in really giving a finished look. The only reason I’m staining everything is because the entire house is built with rough cut beams. Paint would be a huge mistake and I know Rex and Ruth Goode would agree because they did the same thing. So stain it is! I’m happy to see it coming together. THANK YOU RICHIE for cutting each little piece and dragging that nail gun and compressor all through the house. I APPRECIATE IT! I still need to putty all the little nail holes and touch up the stain but that’s no big deal.


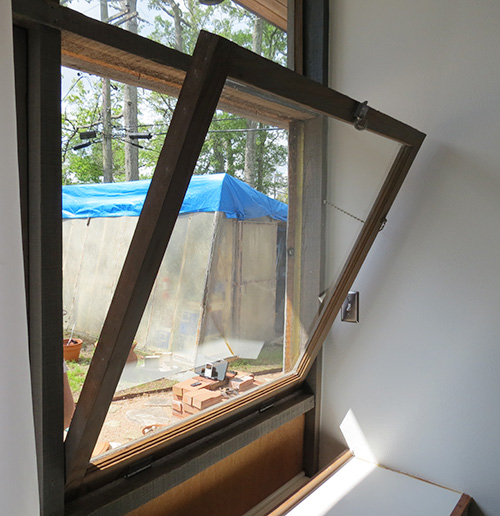
After the trim went up we turned to the windows. Both the inside and outside have to be re-done. If you don’t do the outside, the rain will leak in and the inside will be stained again and I’m ONLY DOING THIS ONCE! So we’ve been working on both. Richie tears them apart, makes repairs and puts them back together. I scrape, sand, caulk, and then stain. We’re a good team, really. :-)
Here’s a little sneak peek as we get started. I’m amazed at the power of a brush, some stain and some elbow grease. Such improvement. More to come on that later in the week.

And I couldn’t resist while out in the front yard taking a picture of my red bud tree. This is it’s second year and the first year it really bloomed. I squeal with delight every time I pull up the driveway. Those little pink buds make me happy. Spring is definitely here and I’m not complaining. I’m sneezing.. but still not complaining.